Blazor 3d Boxes
Implementation
There are a couple of Blazor coding items that we have to be able to do.
1. Add on click event handler
2. Use inline logic to set a style
3. Use a method call to set a style
The Click Handler
For the button that starts, and switches between views, we need a click event handler. We have done this many times before, so it is very straightforward:
<button id="btn" class="magic" @onclick="ShowBoxesInDisplay">Magic 🎩</button>
What is cool about this, is including the image for the button right in the source code.
Inline Logic to set a style
For the container of the image, we need to add a style called big if we want the 16 boxes, we need to remove the style. All the big style does is make the container div bigger. Giving the image the effect of blowing out.
To set or remove the style, we use a ternary statement:
<div id="boxes" class="boxes @(goBig ? "big" : "")">
This makes it easy to understand what is happening.
The method calls to set style
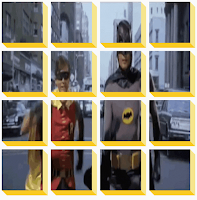
This is an interesting code. If we are showing the 3d boxes we need to create a grid of 16 equally spaced boxes and add some shadowing to resemble a 3d box. To do this you need to adjust the position by the box location, X and Y, and by 125px.
In reality, you are adding the image as the background image to all 16 boxes, but moving the viewable part of the image to match the box's location. This makes it look like the image is dissected into 16 pieces.
In the HTML:
{
int ii = i;
for (int j = 0; j < 4; j++)
{
int jj = j;
<div class="box" style='@GetPosition(jj,ii)'></div>
}
}
Summary
This project was done in Blazor web assembly, but the code works just as well with Blaozr Server Side.
Not sure where or if I would ever use this effect in an actual application, but it is fun to play with. Sometimes you have to do a project just to have fun!


%20built%20with%20Blazor.%20The%20scene%20features%20a%20dynamic%20web%20app%20running%20o.webp)
Comments
Post a Comment